Sunday, October 31, 2010

Happy Halloween!

I promised party pictures and I've got pictures.  It was a long day of prep(2 parties and all) so I abdicated the role of picture taker to Computer Genius.  Luckily, he loves to take pictures, and snapped some great ones.  Here's Snuggle Bunny all dressed up and ready for the party to start.
I sewed this costume for Whirling Dervish years ago and remember swearing a few times working with the gold lame` fabric for the quilted boots and belt.  Snuggle Bunny liked the costume so much that he slept in it(without the hooded helmet) and is still wearing it right now.

The first thing that guests do when they arrive is crawl through the tunnel behind SB and make their way to the mad scientist's laboratory(SB's room.)  That crawl through the tunnel is made icky because the yarn you see hanging in the tunnel has been moistened ahead of the party.
The resident Mad Scientist has been working away on crazy bubbling experiments.
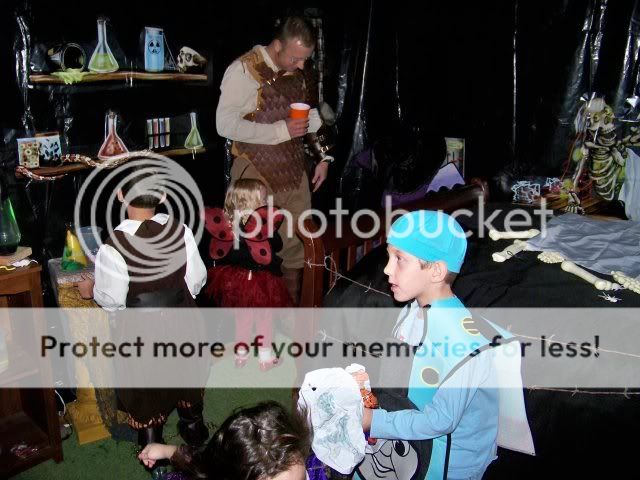
One of WD's friends played the part of our Mad Scientist to crazy perfection.  Unfortunately CG didn't get a pic of him.  The Mad Scientist was assisted by Igor, standing by the plasma ball.
The Mad Scientist and Igor have just flipped the switch to awaken the creature they've been working on.  "It's Alive!!"
They will soon need to chain this monster up with the bogeyman in the closet.
Remember when I reorganized SB's closet in my first post here. Rearranging things so that he could reach all of the storage and could put away his own clothes left tons of space at the top of his closet to house this ghoul.

When guests leave the Mad Scientist's Lab, they pass by the Dining Room with the food tables set up.  Here's one of the food tables.
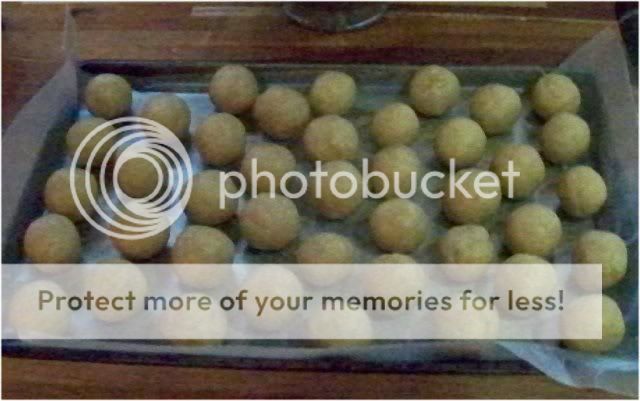
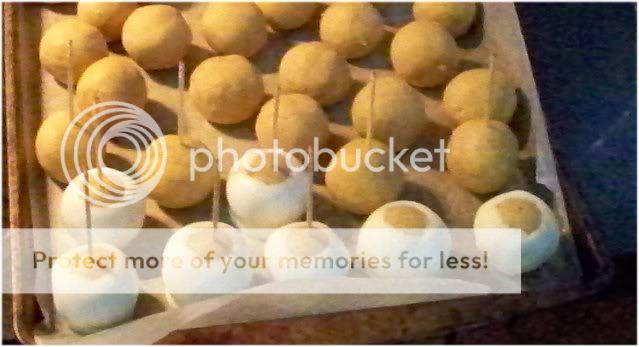
Alongside the bloody eyeballs that I showed you all here, I served brain cupcakes, spiderweb and tombstone cupcakes, bloody octopi(hot dogs,) nutty ghosts(stuffed phyllo dough,) meringue bones, mummy toes(puff pastry wrapped cocktail weiners,) cheesy bats(quesadillas cut to shape,) ghost pops, jello jigglers, rat pellets(mixed nuts,) vampire fangs(cheese triangles,) hunks of flesh(pepperoni,) crusty booger balls(a coconut, almond confection,) and frankenstein mousse cups.

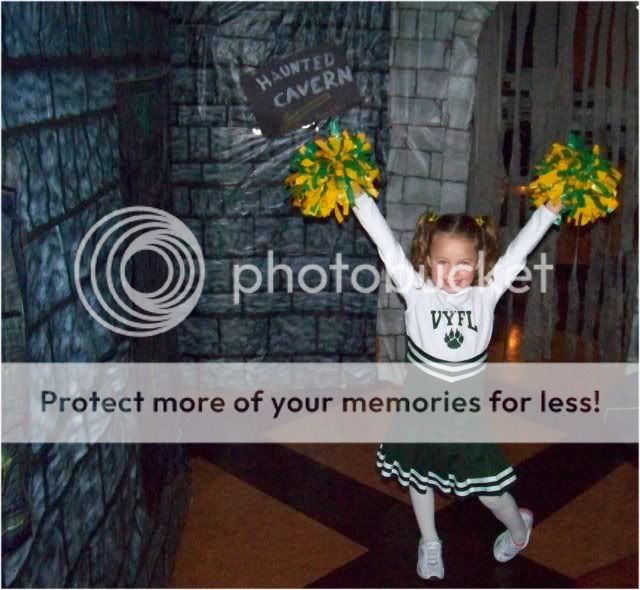
Passing the DR, guests make their way through the kitchen that I showed off here.  This cheerleader needed to show off her costume before heading down to the haunted cavern that you toured here.
Behind her, you can see the archway we constructed to partition off the "business" side of the kitchen from the decorated eat in part of the kitchen.  We replaced most of our lightbulbs with flickering, red, or black bulbs, but I still needed to be able to see while working in the kitchen and the false stone wall was our solution.

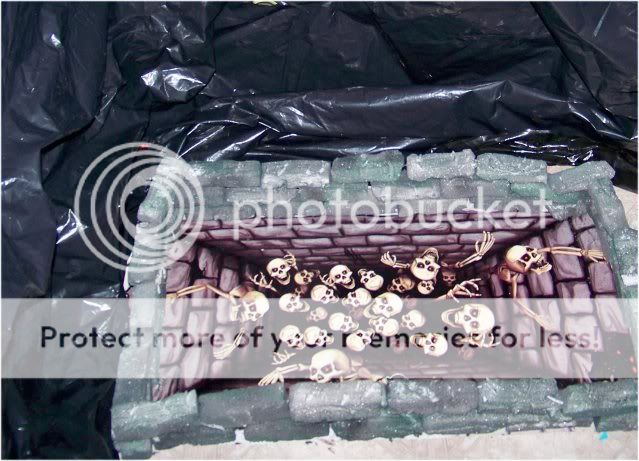
Here's our Scariest Costume winner heading down to the Haunted Cavern.
Yes, our stairs are really that scary looking.  We have reclaimed wood treads that we plan on rebuilding the staircase with.  Look for that upcoming project sometime this winter.

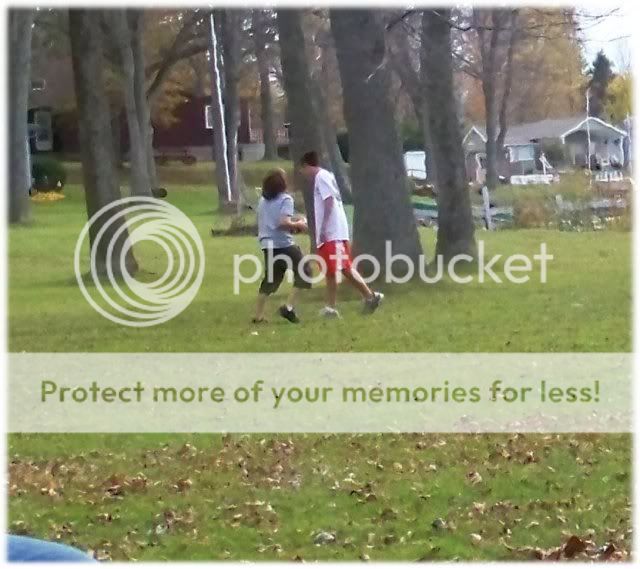
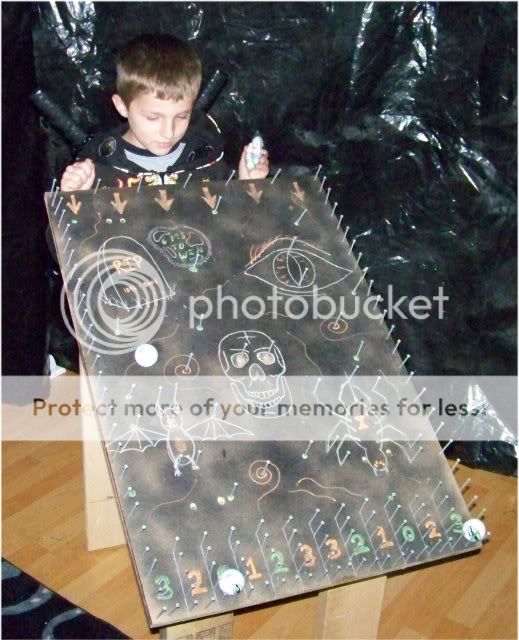
The guests enjoyed several carnival style prize bucket type games.  Here's one playing the ball drop game.
 And here's SB first in line for the Bean Bag Toss.  WD was running this game.  He didn't dress up for the party, but will be donning a costume tonight to go trick-or-treating.
We played a number of larger prize-everybody plays type games, too.  Parents love watching the kids play Mummy Wrap.
I buy the cheap, scratchy toilet paper once a year just for this game.

They also played Pass the Pumpkin which is basically Hot Potato played with a pie pumpkin.
SB was the first one out of this game.  But none of the first kids to be bumped seemed to mind.
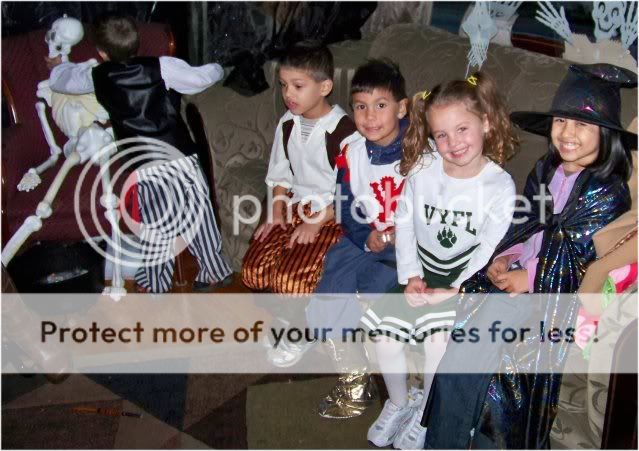
The pirate to the left of SB won the Judges Choice costume award.  His hat(not worn in this pic) had Jack Sparrow hair attached to it and was just a great looking costume.

Here are our other two costume award winners.  The kitty cat won Most Creative.  We felt that it was important for Most Creative to go to a homemade costume.  The ladybug fairy won Most Adorable.  My co-judge refused to vote for her because she's her mom, but as host I got to override her.  Because really have you ever seen anyone cuter?
The last big game we played was balloon stomp.  For those who aren't familiar with this game, it's very loud and chaotic and the perfect thing to do before sending the kids home.
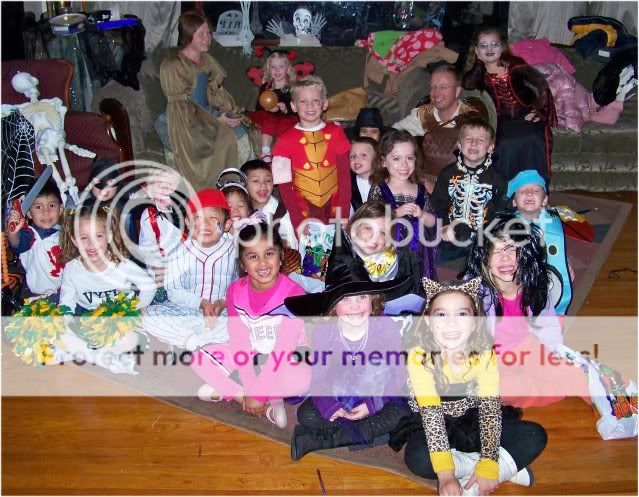
The kids all had a great time and I think the parents did, too.  Here's a pic of everyone waiting their turn to hit the pinata.
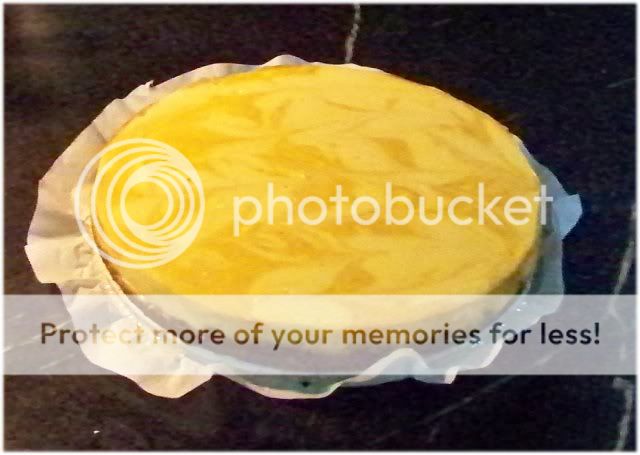
After all of the kids left(except a couple who's parents were attending the adult party,) I made a quick wardrobe change and put out the food for the next party.  I was a "good witch" for SB's party and a "bad witch" for the later party.  Unfortunately I don't seem to have any pics of me in costume.  I had made more mummy toes as well as bones(ribs,) and bat wings(3-part chicken wings,) ahead of time that just needed to be popped into the oven.  I also put out the pumpkin swirl cheesecake and pecan pie tartlets that I had made ahead here and here, a crudite platter arranged in skeletal fashion, and shrimp in cocktail sauce molded into a brain shape.

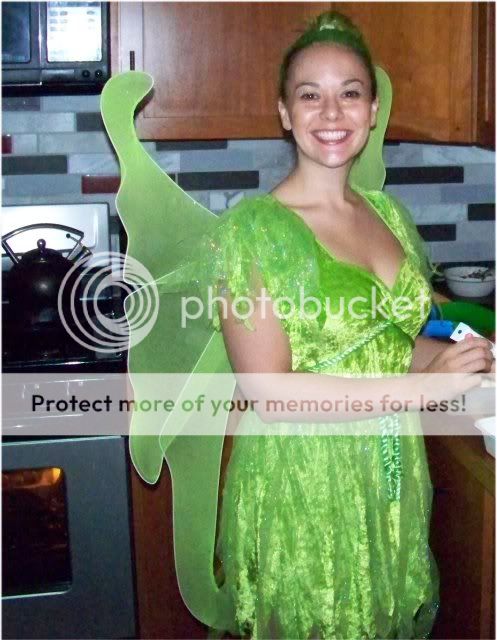
My good friend was up from Manhattan for the weekend.  She came early to help out.  Normally a vampire, she couldn't find her fangs so came as Tinkerbell.
That's all I have from the evening, because when the last kid left, CG set down the camera and picked up a beer.  But it's really no big loss.  Kids in costume are way better in pics, than adults as Village People, rednecks, pregnant brides, etc.

Thanks for popping in and checking out SB's party.  I'm linking up to Kitchen Bouquet's Flashback Friday, Just a Girl's Show & Share Day, The Tablescaper's Seasonal Sunday, and Under the Table & Dreaming's Sunday Showcase.

*Editorial Note* I had a devil of a time getting this post out today.  WD had a lacrosse game today, then Blogger lost my whole post past the 2nd pic and I had to rewrite the whole thing and I'm not sure why the group pic is so squished, it looks normal if you right click on it.


Friday, October 29, 2010

Git Outta There

We've been busy decorating the vast majority of the house inside and out.  I've shown you the graveyard in our front yard here and our kitchen and basement here and here.  I've started to turn Snuggle Bunny's room into a mad scientist's lab, but the finishing touches won't happen til tomorrow, because it's kindof hard to sleep in a room with ghouls.  You may be wondering, with so much of our house ready for the parties, how do we keep our guests from wandering into the rooms that we don't want them in?

Good question.  And there are several ways we handle this.  Some are a little subtle.  Like this Do Not Disturb sign that I printed up for our master bedroom.

Here's a printable version of the tombstone.  You can right click on it then print it out.

We also just wall off spaces that we don't want people to go in like the hallway to the garage.

Or we do a combination of walling off the spaces plus some over the top theatrics.  The left of this space is our guest room which is currently housing every piece of furniture removed from the party ready rooms.  And to the right is our office.  We don't need guests in there.
The blurry blue light is a moving, moaning ghost with a skull head and skeletal hands.  It hangs above a "dungeon pit."

Here's a closeup of the dungeon pit.

So there you have it.  Some of the ways we keep the private rooms private.

Thanks for popping in and check out the neat projects at Just a Girl's Show and Share party.  The next time I post, I'll have pics from the halloween parties.

Wednesday, October 27, 2010

All Things White Chocolate

I'm still plugging away at my list of make ahead treats for this weekend's parties.  I like to make all of the white chocolate treats at the same time so that I only have to be standing over a double boiler once.  One of the standout treats on my Halloween buffet that consistently gets oohs and aahs is my Peanut Butter Eyeballs.  !Warning! This is a diet busting recipe.  They are peanut butter balls, dipped in white chocolate, and decorated to look like bloodshot eyes.

Start with 1 stick butter at room temperature.  Cream that together with 1 1/2 cups creamy peanut butter.  Beat in 1 lb(that's right a whole pound) confectioner's sugar and 1 tbsp vanilla. 


Form into balls.  The batter will appear crumbly, but the heat from your hands will help to form the balls.  Freeze peanut butter balls on wax paper lined cookie sheet.  Make sure they are really frozen solid.

Melt white chocolate in a double boiler, or if you don't have one, in a glass bowl over a small sauce pan of simmering water.  It will take about 12 oz to cover the pb balls, but I melt down way more because I use it for other treats. *Make sure to not get any water into the chocolate, because it will seize and become unworkable.*

When the chocolate is melted, spear pb balls with toothpicks or skewers and dip partway into the chocolate, leaving enough peanut butter showing to be the brown iris of the eye.  Place back on the wax paper. 

You need to work quickly, because when the peanut butter balls soften up, they'll fall off of the toothpicks. You may need to occasionally place the tray back into the freezer.  I like to use 2 trays, alternating between one in the freezer and one that I'm working with.  That way there are always frozen balls to work with. 

When the chocolate has hardened and the peanut butter has softened, pull out the toothpick.  Place a mini chocolate chip into the hole left by the toothpick.  This is your eye's pupil.

This is the stopping point for make ahead eyeballs.  Squiggle some red decorating gel onto the eyeballs to simulate bloodshot eyes within an hour of serving.  The gel can get gummy which will cause the eyeballs to stick together if you do this step ahead of time.  You can store these in an airtight container in the refrigerator for a week or however long it takes for them to disappear.

Not one to waste chocolate, I use the leftover melted chocolate to pipe out other treats.  I made spiderwebs to top cupcakes with.

And to use it all up, I made some freeform ghost lollipops with chocolate chip eyes.

I meant to post this eyeball tutorial much earlier today, but my BFF came over with a couple yards of fabric and trim for me to turn into a costume.  She's going to be a genie.  You'll see the costume when I post pics from the party.

Thanks for popping into my kitchen today and check out what everyone else is up to at Somewhat Simple's Strut Your Stuff and Fireflies and Jellybeans's Show off Your Stuff parties.

Tuesday, October 26, 2010

Carving Time & Pumpkin Swirl Cheesecake

With less than a week to go, it was time to carve our pumpkins.  Every year we carve out(har, har) the time to decorate our pumpkins while watching Tim Burton's The Nightmare Before Christmas.  Charlie Brown is saved for another night, pumpkin carving means Jack Skellington at our house.

Plastic is laid out and the shirts come off because it's mess making time.  Snuggle Bunny is a planner and likes to draw his design on paper first, then transfer that to the pumpkin before carving.

Whirling Dervish likes to cut without a plan.

The boys always finish ages before I do.  I tend to go in with grandiose plans for my pumpkin, picking the super, duper, difficult, expert level picture out of the carving book or drawing ridiculous freeform stuff.  This year's design involved about 50,000 holes in various widths.  Thank goodness for the quick change head on the drill.  I was still working on mine when the boys had headed off to bed.  Here they are lit up in the basement.  I was too tired to bring them out to the stoop.

And here they are in the light of day.
The poor scarecrow is looking a bit bedraggled, because it rained overnight.

After dragging the pumpkins out to the stoop, I fired up the oven for another baking session.  My cheesecakes are famous inside of my family and circle of friends.  My father claims that he can no longer eat store bought cheesecake, because mine is so good.  I realize he's supposed to say nice things having helped create me, but trust me, that's high praise.  I have numerous variations of the basic cheesecake, but during autumn there's only one I make: the Pumpkin Swirl Cheesecake.


My cheesecake recipe is really easy for the non-baker to make.  It doesn't use a bain marie(water bath) or any other tricky techniques.  First things first.  Put all your ingredients on the counter and leave them there.  Go take a shower, have some coffee, get your kids ready for school, drive to school to drop off the lunch your child forgot, catch up with your favorite blogs(like this one, hint, hint,) etc.  The batter won't mix up right if your cream cheese and eggs aren't at room temperature.

Preheat your oven to 425.  I know that's high.  Trust me.

Let's start with the crust.  I like to use ginger snaps for the crust on my Pumpkin Swirl Cheesecake because they taste like holidays to me.  Feel free to use graham crackers.  I use a whole package of these ginger snaps by Mi-Del.


You can crumble them in a food processor, or if you don't want to dirty another hard to wash machine, do what I do.  I pop my cookies into a ziplock baggie and crush them with my rolling pin.

Melt 6 tbsps of butter and pour the butter into the baggie.  Smush the butter and crumbs together until every crumb has been moistened with the butter.  Dump the crumbs into a 9" springform pan that has been buttered and lined with parchment paper.  Press into the bottom of the pan with the back of a spoon.

Beat 3 - 8oz blocks of cream cheese in your stand mixer for 4 minutes until nice and creamy, scraping down the sides every now and again.  Beat in 1 - 14oz can sweetened condensed milk.  Add in 3 eggs one at a time.  Add 1 tbsp vanilla extract.

Pour 3 cups batter in large measuring cup.  Add 1/2 cup pumpkin puree and 1/8 tsp allspice to remaining batter.  Alternate dropping globs of plain batter and pumpkin batter into the prepared pan.  Run a knife through the pan to swirl the batter.


Place in the preheated oven.  Set your timer for 12minutes.  When the timer goes off, reduce the oven temperature to 225.  DO NOT OPEN THE OVEN DOOR.  Let it bake at 225 for 1 hour.  Turn off the oven.  DO NOT OPEN THE OVEN DOOR.  Leave the cheesecake in there for another hour.  You may now open the oven door and pull out a perfect, creamy, uncracked cheesecake.


Let the cheesecake cool completely before placing in the frig.  Refrigerate for 6 hours before eating.  I'm freezing this one for Saturday.

So just in case you missed it above, under no circumstances should you open the oven door when baking a cheesecake without a water bath, not even for a peek.  The temperature fluctuations will cause cracking, which won't affect the taste, but will make it not so pretty.

Thanks for popping in and would love for you to try this at home.  Cheesecake never fails to impress, put your own flavor spin on it.  I'm linking up this recipe to The White Blue Sky's Culinary Evolution, Gluten Free Homemaker's Gluten Free Wednesdays, Fireflies and Jellybeans's Show of Your Stuff party, and Organizing Junkie's Menu Plan Monday.

Monday, October 25, 2010

Weekend WrapUp + Pecan Pie Tartlets

This past weekend we went up to the cottage for probably the last time before it gets closed up for the winter.  We were celebrating my nephew's birthday so 4 generations of Computer Genius's family converged on the cottage. 


The boats and jet ski are all out of the water for the year, so my sister-in-law went all out with decorations and activities.  The whole cottage was done up with spooky decor.


The cake was positively ghoulish.  Can you believe this wasn't store bought?  That's right SIL made it.


 And the kids enjoyed a treasure hunt and haunted hayride.  Look at that giant bucket of spooky treasure.

That's my super creative SIL on the right.
The kids even got to use the apple peeler, corer gadget to make applesauce.


But what was most fun probably wasn't the planned activities.  It was the just hanging out together.  This nephew is the cousin closest in age to Whirling Dervish and the two just have a blast when we can get together. 


There was a lot of wrestling, biking, ball playing and just hanging out down by the water.


That last pic is a bit distorted because it was taken over the firepit.  I kindof like the effect though.  It almost looks like a watercolor.  I'm thinking this pic might be great printed on canvas.

And here's the firepit that everyone sat around this weekend.(October in upstate NY is Cold.)


So that was our weekend.  Having lost a baking weekend, I have to play catchup and will be posting many recipes this week as I get ready for this upcoming weekend's parties. 

Today I made pecan pie tartlets.  They'll be served at the adult party and can sit in the freezer until Saturday.  Start by melting 2/3 cup butter in a microwave safe mixing bowl.  Beat in 2 eggs.


Add in 1 cup dark brown sugar.  If you don't have it, you can make your own easily.  Brown Sugar is just granulated plus molasses.  1-2tbsps molasses per cup of granulated.  Since I only keep light brown sugar in the house I added 1 tbsp of molasses to the batter.

Add 1/2cup amaranth flour.  Amaranth has a nutty flavor that I think gives these tartlets a little something extra, but feel free to substitute rice flour, or regular flour if you're not gluten-free.  Add 1 cup chopped pecans.  I used my mini chopper, but a small child with a hammer and a ziplock baggie work just as well.

Spoon the batter into a mini muffin pan and place a pecan half on top of each.


Bake at 350 for about 25 minutes.  Turn them out after they've cooled a bit.  Aren't they cute?


These are the perfect bitesize portion for a tailgate or cocktail party.

Thanks for popping in and reliving the weekend with me.  I'm linking this up toSeaside Simplicity's Tailgating Time, Organizing Junkie's Menu Plan Monday, Gluten Free Homemaker's Gluten Free Wednesdays, and Remodelaholic's Recipe Swap Party.