
I was planning on finishing and posting this project yesterday, but this took much longer than expected. I've hung fabric with starch before like here in SB's room, so the wallpapering didn't take very long, but the prep took approximately forever and with the kids out of school, I spent the vast majority of the day driving around in circles (to and from practice for WD, to and from play date for SB, pick up and drop off friend for WD, a couple emergency stops at various stores for "must have" items for the play dates, etc.) And to top it all off, I reached my photo storage limit so had to do some monkeying to get the pictures on this post. Grrr.
I've been in the process of making over the front hall closet. I was waffling between hanging wallpaper on the back wall, or painting and stenciling it when I came across this fantastic fabric. It was a bright, happy turquoise(yay!) with a fun, floral geometric pattern(loves!) and extra special bonus - it was an outdoor fabric so it could take a beating in the much used foyer closet.

Hanging fabric on a blank wall is super easy. This is the wall I planned to hang the fabric on.

Not so blank. Do you see that shelf support hanging out in the middle of the wall? That would cut into my pretty fabric and it needed to go. I applaud the recycling effort of the builder who used the scrap ranch molding as a shelf support, but would it have killed him to cut it down to size?

I first ran around the edge of the molding/shelf support with a utility knife to break any paint or caulk seal.

Then I pried it off the wall. Prying it off left a couple of dents in the wall. I might want to paint this wall someday if I get tired of the fabric, so I prepped the wall like I was painting. That meant spackle, drying time, sanding, primer, and more drying time.

After all that wall prep, I was ready to hang the fabric. I rolled on some liquid starch onto the wall with a paint roller and stuck the fabric onto the wall. Trying to adhere a piece of fabric this large and heavy would generally speaking be a 2 person job, but since everyone else was still in bed this morning, I used some thumbtacks to hold the fabric up while I was smoothing it out.

I cut around the shelves with a utility knife

and rolled on another coat of starch onto the fabric. You want the fabric to be soaked through with the starch. Once the entire piece of fabric had been smoothed onto the wall and the excess cut away, I removed the thumbtacks.
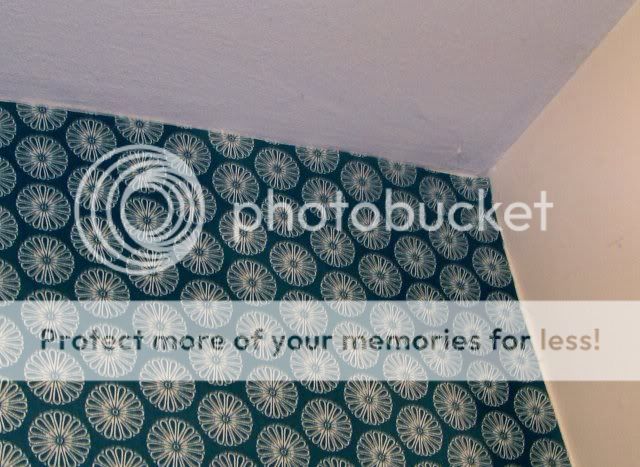
And here's the finished wall. The uneven color is because it's still drying. The darker areas are still wet.

You can leave the wall as is or finish it off with some ribbon. I'm searching for the perfect coordinating ribbon to frame the wall. I figure I can find a good spool of ribbon for $2 which'll bring the total for this madeover wall to $10. I'm also looking for a new light fixture, because the bare bulb doesn't do my new pretty closet any justice.
Thanks for popping in and checking out my pretty new fabric wall. I'm linking this up to Between Naps on the Porch's Metamorphosis Monday, Little Eme's Tute Your Own Tuesday, and Shabby Nest's Frugal Friday.


Lovely fabric and it looks gorgeous in the closet! Thanks for visiting my blog and commenting. Have a great week!
ReplyDeleteWOW! What a difference to your wardrobe! It was very nicely with the fabric on the wall!
ReplyDeleteYou do this much work for a closet? I thought it was almost silly to paint our closets and will only paint in the major rooms, too. --Too many times of removing someone else's choices of wallpaper in previous houses, and I like to change things, and a gallon of paint is such a fast and easy way. No wonder you have the Super in your name! But you may have to take the "Lax" out. ;-)
ReplyDeleteWow, that is a show stopper, if a closet could be called fun, this is a fun closet. Thanks for dropping by!
ReplyDeleteCarol
I think this is a great idea to soften a space, especially in your closet! Great job! ♥
ReplyDeleteThat really looks nice. I want to try that on the front of a cabinet on the door fronts. Thanks for joining the party.
ReplyDeleteThis looks great! I have thought of doing something like this in my daughters closet...thanks for showing how you did it. (you made it look easy!) Very pretty!
ReplyDeleteGlad I saw this on Kim's.
Amy
www.11magnolialane.com
That is amazing....great job!
ReplyDeleteNice job - you've created a very fashionable closet :-)
ReplyDeleteThanks for sharing its !
ReplyDeleteCremichef offers a set of today’s requirement of kitchen and has designed the very comfortable knife sets of paring knife, chef knife, santoku knife and utility knife, etc.
Ceramic Knife
Love it! I saw Nate Berkus show this for those that live in apartments and can't paint or wallpaper. I think it is so cool and I love it in your closet!
ReplyDeleteHow pretty it turned out! I don't know about that builder: likely a man.
ReplyDeleteBrenda
I linked over from Tools are for Women Too. I love this project. I have always wanted to try starching fabric to a wall. A closet is a perfect place to start. I am your latest follower. I would love if you would follow me back at www.diybydesign.blogspot.com. I look forward to keeping up with your blog.
ReplyDeleteI love it! I am thinking about trying to use liquid starch to hang some fabric. Thanks for the inspiration and great fabric choice!
ReplyDeletethis is brilliant, have just been searching the internet for how to do it so this is such a great help.... wish me luck on my fabric wall papering effort :) x
ReplyDeleteI absoloutely love this idea! I have a small office space under our stairs, an area where I can get a little more bold-- this will be perfect! I'm going to look for fabric today!
ReplyDelete