Pages

Saturday, July 30, 2011

Spirit, Let's Hear It

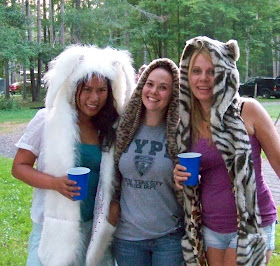
Who just finished that title with, "Let's Go, Fight, Win"?  Obviously I've been to too many youth football games and listened to entirely too many cheers.  This post has nothing to do with football or cheering, but lots to do with Spirit.  Specifically Spirit Hoods.  What, you've never heard of Spirit Hoods?  Neither had I.  These are Spirit Hoods.

Ridiculous, I know.  Even more ridiculous when you realize they want $130 for one of these.  Slightly less ridiculous when you see one on Jared Leto.

So here's the deal.  My good friend, Manhattan Diva, had been visiting several months ago.  As soon as she saw me, she said, "I need you to make us some Spirit Hoods."  I had no idea what she was talking about, so she pulled up the website while explaining that everyone was wearing one.  The Kardashian sisters, Vanessa Hudgens, etc. could all be seen walking around the city in one. 
Vanessa Hudgens

Now I looked at MD, and said, "um, sweetie, I'm a middle aged suburban housewife, I don't need or have any interest in looking like a Kardashian."  So she came back with, "But just think how fun it'll be when we're sitting around the campfire, being too loud, and the park ranger's flashlight comes bobbing up the way, and he sees us wearing Spirit Hoods." (insert big toothy smile here)  I replied, "I'll see what I can do."  Not wanting to have to here MD's inevitable, "I ask one thing..." - I made the Spirit Hoods and they were kind of fun to wear while camping last week.

So here's how I got there.  I cut out my pieces.  I made these on the fly, but drew up a quick cut sheet for you in Paint.  Most fake fur comes in 60" widths.  I used 2/3 of a yard for each hood with a little left over for pillows or something.
Make sure that you cut the pieces as I've drawn them so that the nap of the fur lies in the same direction when pieced together.  Cut the lining pieces the same size as the fur pieces except the back of the hood, and the ears which I'll explain later.  Sew the top edge of the mitten to the top edge of the mitten lining front sides together.

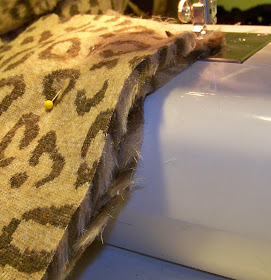
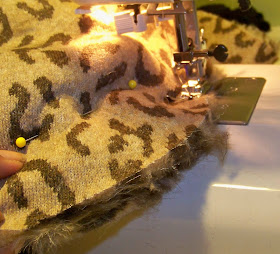
Open it up so that the back sides are together and pin to the front(fur side) of the side pieces.  Top stitch a 1/4" in the whole way around.  With longer fur(like my rabbit,) it's advisable to stitch with the furry side down so it doesn't get caught in your sewing foot.

It'll look like a sandwich like this of fur, lining, more fur.

Here's how the lined pocket looks from above.

Pin together the 2 sides at the top, and stitch across.  This creates a hair seam at the top of your head.

Take the ear triangles,

and pinch them to form ear shapes, and place a couple of stitches to hold them in shape.

Cut the ear lining slightly thinner than the fur triangles, so that the lining is the size of the pinched ear triangle.  Stitch right sides together along the side edges, leaving the bottom open,

and turn them out.  The top edge will have the fur in the seam like a bad comb over.


Take a pin and tease out the hair.

Pin the ears in place facing forward along the top back of the sides, and pin the back hood piece on lining up the center point with the hair seam.  Stitch this together.

Stitch the hood lining like you did the hood itself with the sides coming together at the top and the back stitched on the same way, except the back should be cut in two pieces with an extra inch of overlap in the center.

Pin the lining to the hood with right sides facing together.  Stitch a generous 3/4" all the way around the hood.  This will ensure that all your previous stitched pieces will be fully encapsulated, and won't show any piecework on the finished product.

Turn the hood out from the hole formed by the overlapping lining back pieces.  When it's turned out, stitch this closed.  I don't know how many of my readers will actually want to use this tutorial, but these only cost $12 each to make using Joann's coupons on the fur.

Thanks for popping in and sewing with me.  I'm linking up to Just a Girl's Show and Share Day.
The DIY Show OffPhotobucket

Thursday, July 28, 2011

Sweet Pepper Poppers

I like things spicy, but not everyone does.  I made these Sweet Pepper Poppers to bring over to our friends the other day.  Even the kids could eat them.  (Their kids, of course, my kids are fire eaters.)

I started with these mini sweet peppers that I found at the grocery the other day.

I cut almost all the way through the tops, and cleaned out the seeds.

Next, I mixed together 4 oz of cream cheese, 1 cup of shredded cheddar cheese, 1/2 tsp garlic powder, and some salt and pepper.

I cut off the tip of a piping bag, and piped the cheese mixture into the peppers.

 Close up the caps using the cheese to hold it closed.

I whisked egg whites until they were foamy, and dipped the poppers into the egg whites,

then into some gf bread crumbs.

It was too hot to fry these so I popped them on the grill.  They'd probably have better color fried, but they sure were tasty.

Thanks for popping in and cooking with me.  I'm linking these up to Gluten-Free Homemaker's Gluten-Free Wednesdays.

Funky Junk's Saturday Nite Special

Wednesday, July 27, 2011

HomeGoods - Love that Place

I came back from my camping trip to find a package waiting for me, and opened it to find this:
Woohoo!  I had recently won a HomeGoods giveaway from Petie at Inspired Nesting.  I was super excited because you all know how much I love shopping at HomeGoods, but to find it packaged up with the hand made soap was a special treat!  It smells so good!  Petie is a relatively new blogger and was celebrating reaching 200 followers with this giveaway.  Her blog is full of beautiful, inspirational photos as well as some household projects and thrifty finds.

I couldn't wait to run out to HomeGoods, and on my latest trip this is what I came back with.
I love this tiered dessert stand.  You all know that I have a penchant for the sweet treats, and it's always nice to be able to display them well.  The tart pan was only $2!  It had to come home with me, and I've been looking for a grill wok ever since Deva showed off hers in this post.  Everything is so well priced that I still have about half the amount left on my giftcard.

Thanks for popping in and checking out my good fortune.

Monday, July 25, 2011

I Scream, You Scream...

We all scream for Ice Cream...especially when it's been blazing hot out.  Most of the nation has been under a blanket of heat, and I'm sure we're not the only ones breaking out the ice cream 2 and 3 times a day.  July is National Ice Cream Month after all.  We like to keep things fun around here, so that means pulling out the toppings carousel for sundaes.

As well as making ice cream sandwiches.

All you gluten eaters can run out and buy a box of these on sale for 99 cents, but when you keep a gluten-free kitchen, you don't have the luxury of just buying treats.  So I make them.  I started by mixing up the same batter that I used to make my Whoopie Pies.

I lined my large jelly roll pan with parchment paper, buttered the paper, and spread out the batter.

I baked this in a 325 oven for 25 minutes.  I then cut the sheet into sandwich sized bars with my pizza cutter, and cleaned up the edges with a knife.

I pricked holes in the rectangles with a fork.  Keep a dish of hot water to dip your utensils in, so that the partially cooked batter won't stick to them.

Put the tray back into the oven for 10-15 minutes.  When you remove the tray, let them cool completely before making the sandwiches.  I cut a few mini sized bars for those of us watching our calorie intake.

Set your ice cream on the counter to soften for 10 minutes, before making your sandwiches. 

Put them in the freezer to harden up before serving.  The cake parts will still be soft, but the ice cream will be just right.  Here's one of the mini-sandwiches.

I don't even bother wrapping these up, because they don't last for more than 24 hours in the freezer before being gobbled up.

Thanks for popping in and baking with me.  I'm linking up to Home Stories of A to Z's Tips and Tutorials Tuesdays.